For this project, I set out to learn Ansible and how it could be used to automate network configurations on Google Cloud Platform (GCP). Since may enterprises are pushing their engineering and operations teams to use Ansible to automate their manual tasks, I also figured that this would be an opportunity for me to gain a deeper understanding for the potential of what this type initiative might be able to achieve. Finally, by implementing the automation on GCP, I felt that this exercise would give me the opportunity to further practice what I had learned while getting my Google Architect certification. What follows is a description of the environment I setup and some of the insights I gained in the process.
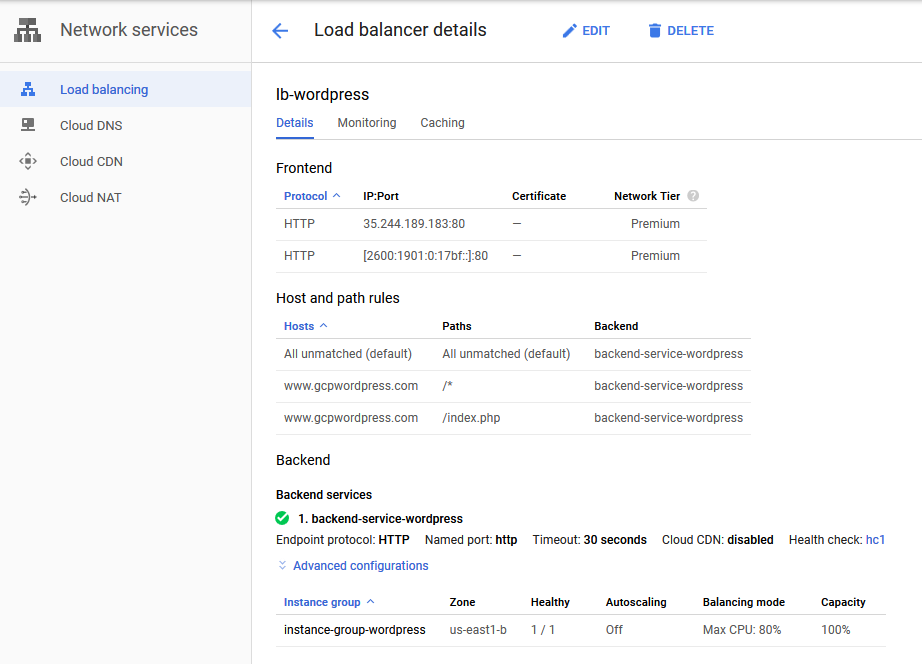
Since my goal was not to become a guru in developing Ansible playbooks, I reused and modified some sample playbooks provided by Ansible in their documentation. For the testing I setup an Ubuntu 18.04LTE host running Ansible 2.7 on a GCP g1-small (1 CPU, 1.7G RAM) instance in a dedicated management subnet. The diagram below shows the final configuration I was trying to achieve.
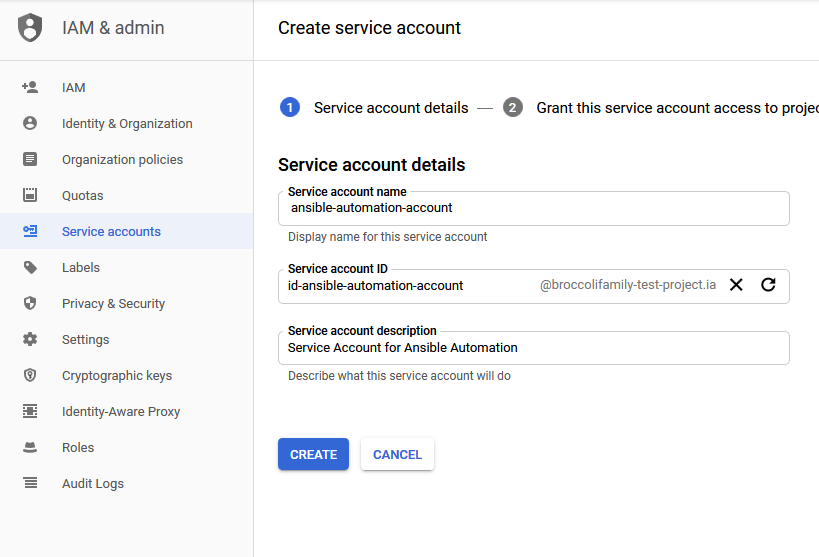
The first step in the process is to create a service account in GCP to allow Ansible to access the environment.
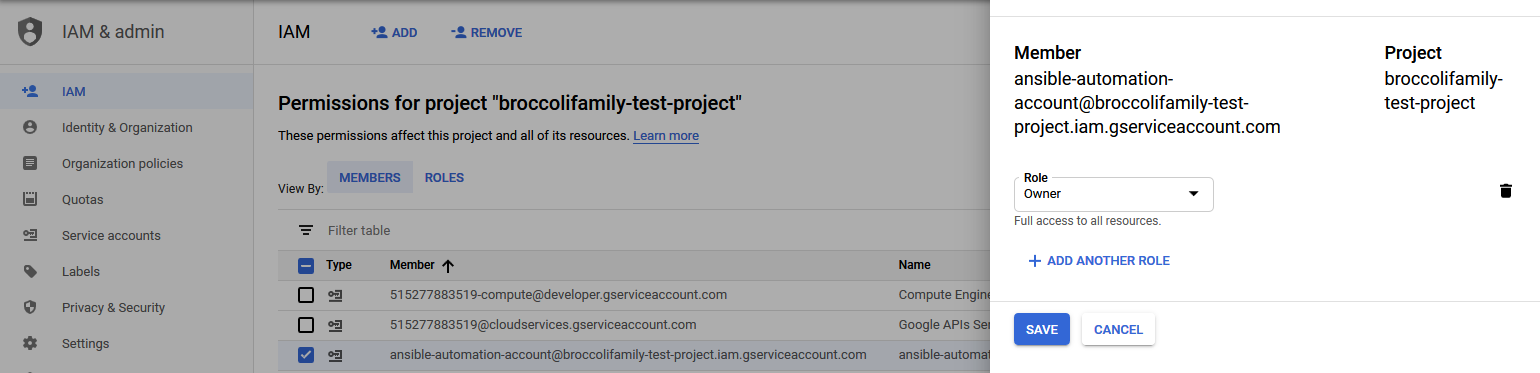
Although I gave the service account full owner rights to the project so that I would not be struggling with access rights, in a production environment, limiting the rights of the service account to only the rights needed to execute approved playbooks should be considered so that the danger of unsanctioned changes being performed are minimized.
The service account credentials were downloaded to the Ansible host so that it can be used when executing commands.

The next step was to enable Ansible to query the target system for the current configuration. After all, you cannot change something you know nothing about. This is done my means of an inventory file which instructs Ansible how to execute the API call to collect the inventory dynamically from GCP.
plugin: gcp_compute
zones:
  - us-east1-b
projects:
  - google.com:broccolifamily-test-project
filters: null
auth_kind: serviceaccount
service_account_file: /home/chris/broccolifamily-test-project-
6e941c82e849.json
This step also requires an update to the inventory section of the Ansible configuration file (ansible.cfg) with gcp_compute plugin:
[Inventory]
#enable inventory plugins
enable_plugins = gcp_compute, yaml, host_list, virtualbox, constructed
and adding a couple of dependent python packages:
chris@ansible-host:$sudo pip install requests google-auth
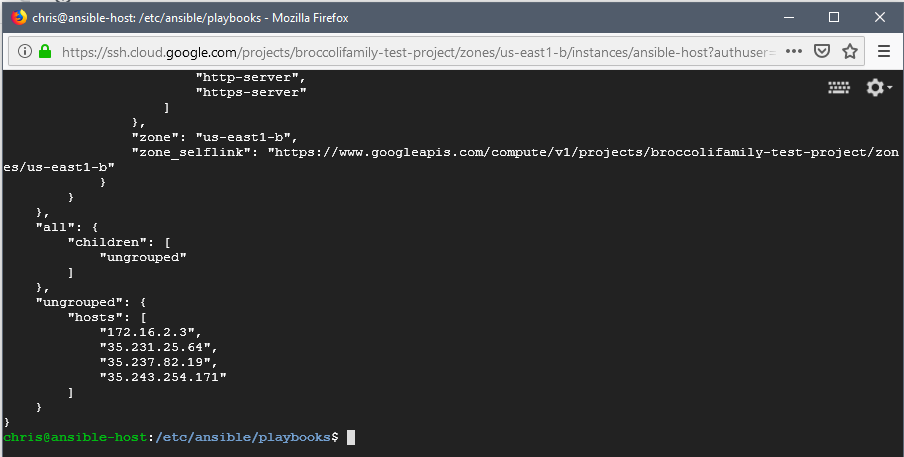
The final step in configuring the environment is to test the inventory file by running the following command.
chris@ansible-host:$ansible-inventory --list -i /etc/ansible/inventory
/inventory.gcp.yml
The output is a JSON file showing the complete configuration of your GCP environment.
At this point the environment is ready to begin running playbooks. As mentioned above, I relied on examples from the Ansible documentation for my testing. In this case I copied an example playbook which adds a subnet to GCP and modified it based on my environment. I also played around with different variable configurations to see the effect of each on the execution. The playbook I ran is shown below.
chris@ansible-host:/etc/ansible/playbooks$ cat gcp_create_subnetwork.yml
- name: test subnetwork creation
  hosts: localhost
  vars:
      project: broccolifamily-test-project
      auth_kind: serviceaccount
      service_account_file: /etc/ansible/credentials/broccolifamily-
       test-project-6e941c82e849.json
      network: "custom-vpn1"
      region: "us-east1"

  tasks:
   - name: create a network
     gcp_compute_network:
         name: 'custom-vpc1'
         auto_create_subnetworks: false
         project: broccolifamily-test-project
         auth_kind: "{{ auth_kind }}"
         service_account_file: /etc/ansible/credentials/broccolifamily-
          test-project-6e941c82e849.json
         scopes: - https://www.googleapis.com/auth/compute
         state: present
     register: network
   - name: create a subnetwork
     gcp_compute_subnetwork:
         name: 'ansiblenet'
         region: "{{ region }}"
         network: "{{ network }}"
         ip_cidr_range: '172.16.5.0/24'
         project: broccolifamily-test-project
         auth_kind: serviceaccount
         service_account_file: /etc/ansible/credentials/broccolifamily-
          test-project-6e941c82e849.json
         scopes: - https://www.googleapis.com/auth/compute
         state: present
     register: subnetwork
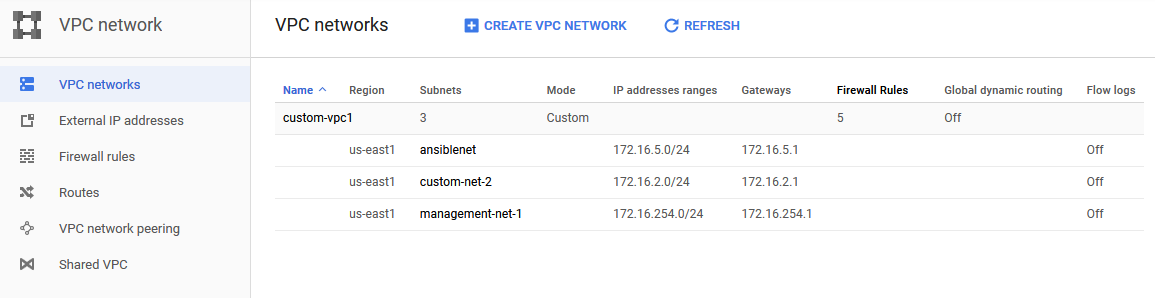
The output below shows that the execution was successful, and a new subnet named ‘ansiblenet’ was created.

Note that in the output from running the playbook shows changed=0 because I had already run the playbook and there was nothing to change. This demonstrates one of the key design goals of Ansible called idempotence, which stipulates that running a playbook multiple times will not change the environment beyond the initial intention of the playbook (in this case adding a new subnet called ansiblenet). This can be beneficial in situations where a playbook fails to complete and needs to be re-run, but on only the portions which were unsuccessful.
Another thing I ran into is that if you also try and create a new network, you end up with a legacy network instead of a VPC (the playbook will create the network but fail on the subnet because subnets aren’t supported on legacy networks). There is no updated version of the gcp_compute_network module which can create a custom VPC. So for now a VPC must be created manually and just referenced here. As long as it is present, you can add subnets to it using this playbook.
All in all I think I achieved what I set out to do. The ease at which I was able to come up to speed and perform a simple automation indicates that the initiative to use Ansible as a global tool is a reasonable goal and should provide benefits with minimal cost and effort. Of course, to be able to develop my own playbooks from scratch will require much more time and testing, something I’ll save for another cold weekend, unless something new comes along.