Author Archives: cbroccoli

Building a Reusable WordPress Image in GCP

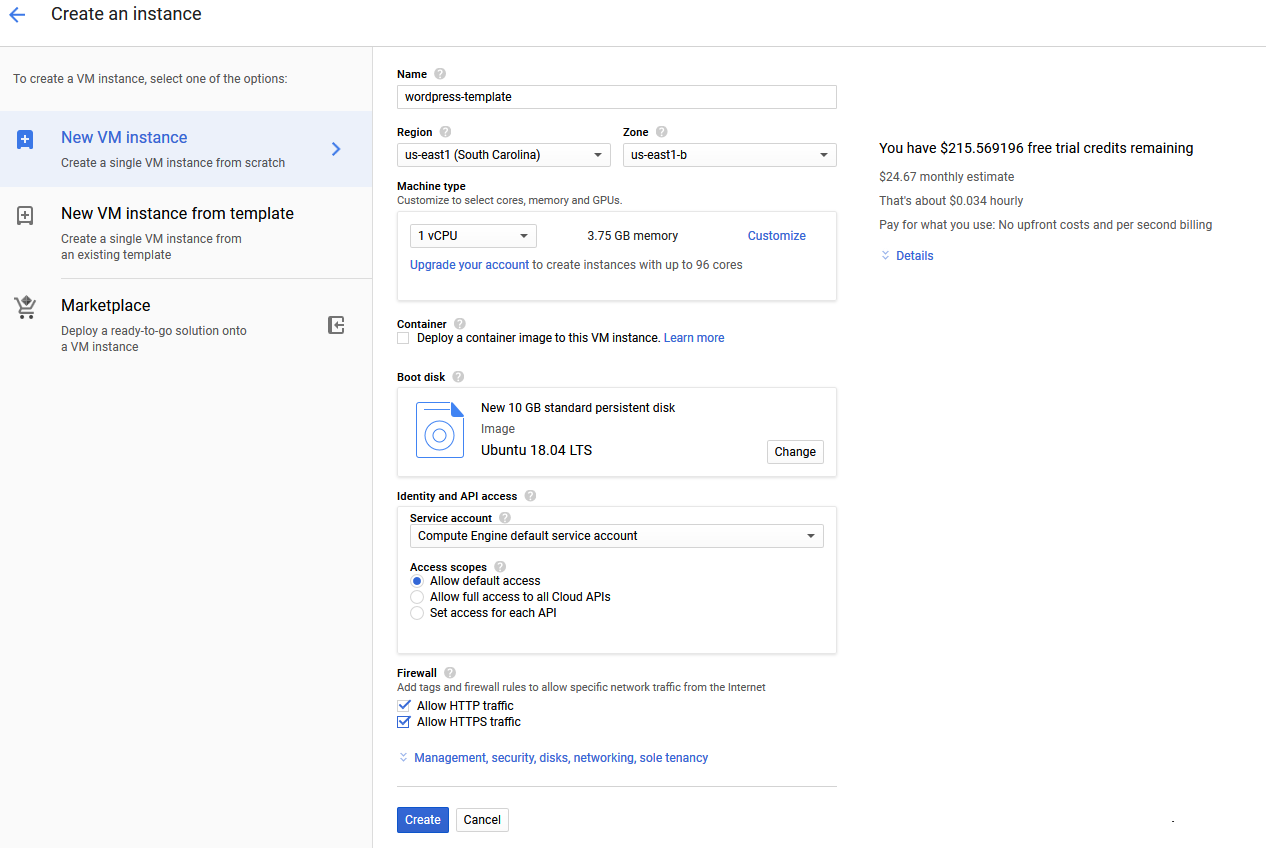
Installing WordPress is fairly straight forward and there are a number of Blogs which describe the process.  For my host I decided to use the standard GCP Ubuntu 18.04LTS image as the base OS.

Ubuntu Image

I then followed the Digital Ocean Blog for installing a LAMP stack and WordPress on the server.   This was fairly straight forward.  The biggest issue I had was logging back into MySQL as root to create the WordPress database.  The commands shown just say to run MySQL…’ mysql -u root -p’, but you get an authentication error when you do this without sudo first.  Dumb issue but took me a while to figure it out.

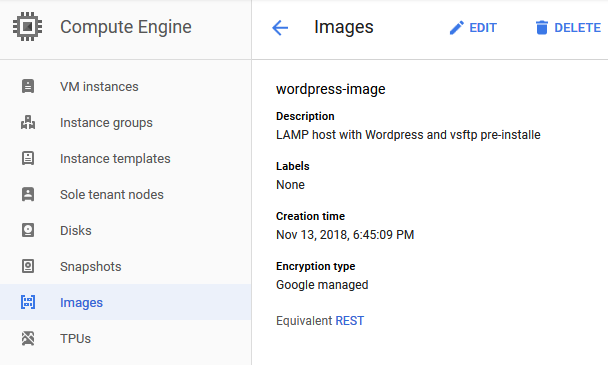
Once the host was running and WordPress was working, I then created a snapshot of the disk and from the snapshot, created an image.  An alternative is just to create the image directly from the source disk, but for that you need to shutdown the host.  I tried both methods and in this case saw no difference.  The final result is a reusable fully functional WordPress image (see this post for why it is not really fully functional)…

WordPress Image


IPv6 in GCP

I recently attended training on Google Cloud Platform to become a Google Certified Professional Cloud Architect.  During the training I learned that GCP does not support IPv6 natively on Compute Engine instances.  I have been using IPv6 at home for years and I know that Google has been supporting IPv6 on its search engine for the same amount of time, so the lack of support was disappointing. The solution for IPv6 on GCP is to implement a public facing load balancer which will expose an IPv6 address to the Internet and NAT that address to the internal RFC1918 private IPv4 address.  Although this is a valid short term option when migrating to IPv6, one of the great benefits of implementing IPv6 is to eradicate NAT from the world, so hopefully this situation is only temporary and in the future native end to end IPv6 will be supported on GCP.  In the mean time, since we need to live with this solution, I thought it would be worth while to test it and see how it works.

So that I was not just doing a basic protocol test, I decided to use WordPress as the target application.  This would allow for more robust testing of the solution and had the advantage of allowing me to practice what I had learned in training on something more than just a basic Apache server.  Another advantage is that this test would allow me to evaluate if I should move this Blog to GCP and make it IPv6 capable, since at the moment it is not.

With this in mind, I will publish a series of posts covering the steps I am following to get WordPress running on IPv6.  Not all of the steps  are directly related to IPv6, but are necessary when setting up a load balanced service in GCP.  Along the way I will share experiences and tips which might prove helpful for future installations.

In the first step, I will setup a reusable Compute Engine image with a LAMP stack and WordPress.   Using the WordPress Image I will then setup the load balancer with an IPv6 address. Finally, I will test using a native IPv6 host.  The diagram below shows an overview of the design:

Access to AWS with a Private Key Pair

So once I was able to login with the default user (in my case ubuntu) I set about trying to setup a local personal user.   Again Amazon provides some decent documentation under “Managing User Accounts on Your Linux Instance” but in this documentation they forgot one important step which I also could not find in the standard Ubuntu documentation.

I setup the new user as described, added a .ssh directory under /home/username and then an authorized_keys file under that.  I used puttygen to generate the public and private keys.
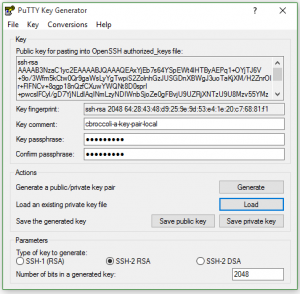
putty_gen

Using copy/paste, I copied the public key shown into the authorized_keys file.

ubuntu@ip-10-95-1-159:/home/cbroccoli-a$ sudo cat .ssh/authorized_keys
ssh-rsa AAAAB3NzaC1yc2EAAAABJQAAAQEAxYjEb7s64YSpEWt4lHTByAEPq1+OYjTJ6V+9o
/3Wfm5kCtw0Qr9gaWsLyYgTwpiS2ZolnhGzJUSGDnXBWgJ3uoTaKjXM/H2ZnrOIr+FlFNCv+8
qgp18nQzfCXuwYWQNt8D0sprI+pwcslFCyl/gD7YjNLdlAqINmLzyNDIWnbSjoZe0gFBvjU9U
ZRjXNTzU9U8Mzv55YMzhz4MM5jQ++1xdj1qeJTtHWZt+SSKPW6To+q7D4IlNoK
+irCV8L6CnvnPL0BvcuuXcuzhttnJ4Rwl6CbHft87n7blJb7tJAaQTtYV/SNGsz2oVr5Ytje
O0Z8lDQmN/SKd+WY+Ft6I7uJw== cbroccoli-a-key-pair-local

Finally I set the permissions to 700 on .ssh and 600 on the authorized_keys file.  All as described.  But when I tried to login, I got the error that the server rejected my key.
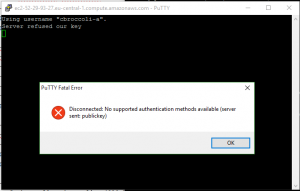
ssh_error

After some troubleshooting, I noticed the owner of the new .ssh directory and the authorized_keys file was root.  So for both I changed the owner to the new user and that finally solved the problem.

ubuntu@ip-10-95-1-159:/home/cbroccoli-a$ sudo ls -la
drwxr-xr-x 3 cbroccoli-a cbroccoli-a 4096 Oct 25 14:42 .
drwxr-xr-x 4 root        root        4096 Oct 25 14:28 ..
-rw-r--r-- 1 cbroccoli-a cbroccoli-a  220 Oct 25 14:28 .bash_logout
-rw-r--r-- 1 cbroccoli-a cbroccoli-a 3637 Oct 25 14:28 .bashrc
-rw-r--r-- 1 cbroccoli-a cbroccoli-a  675 Oct 25 14:28 .profile
drwx------ 2 root        root        4096 Oct 26 07:22 .ssh
ubuntu@ip-10-95-1-159:/home/cbroccoli-a$ sudo chown cbroccoli-a .ssh
ubuntu@ip-10-95-1-159:/home/cbroccoli-a$ sudo ls -la
total 24
drwxr-xr-x 3 cbroccoli-a cbroccoli-a 4096 Oct 25 14:42 .
drwxr-xr-x 4 root        root        4096 Oct 25 14:28 ..
-rw-r--r-- 1 cbroccoli-a cbroccoli-a  220 Oct 25 14:28 .bash_logout
-rw-r--r-- 1 cbroccoli-a cbroccoli-a 3637 Oct 25 14:28 .bashrc
-rw-r--r-- 1 cbroccoli-a cbroccoli-a  675 Oct 25 14:28 .profile
drwx------ 2 cbroccoli-a root        4096 Oct 26 07:22 .ssh
ubuntu@ip-10-95-1-159:/home/cbroccoli-a$ sudo ls -la .ssh
total 12
drwx------ 2 cbroccoli-a root        4096 Oct 26 07:22 .
drwxr-xr-x 3 cbroccoli-a cbroccoli-a 4096 Oct 25 14:42 ..
-rw------- 1 root        root         408 Oct 26 07:22 authorized_keys
ubuntu@ip-10-95-1-159:/home/cbroccoli-a$ sudo chown cbroccoli-a 
.ssh/authorized_keys
ubuntu@ip-10-95-1-159:/home/cbroccoli-a$ sudo ls -la .ssh
total 12
drwx------ 2 cbroccoli-a root        4096 Oct 26 07:22 .
drwxr-xr-x 3 cbroccoli-a cbroccoli-a 4096 Oct 25 14:42 ..
-rw------- 1 cbroccoli-a root         408 Oct 26 07:22 authorized_keys
ubuntu@ip-10-95-1-159:/home/cbroccoli-a$

Now I can login with a unique user, using a private key that only I know and possess.
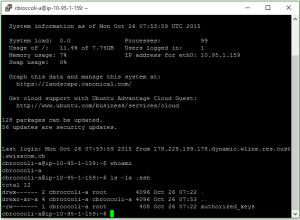
ssh_login