Category Archives: Lab Environment

Access to AWS with a Private Key Pair

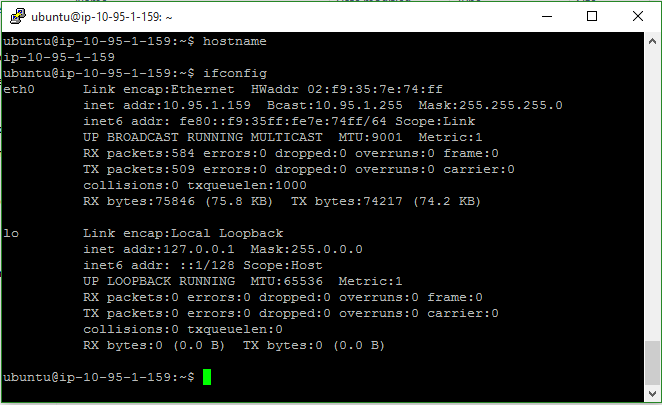
So once I was able to login with the default user (in my case ubuntu) I set about trying to setup a local personal user.   Again Amazon provides some decent documentation under “Managing User Accounts on Your Linux Instance” but in this documentation they forgot one important step which I also could not find in the standard Ubuntu documentation.

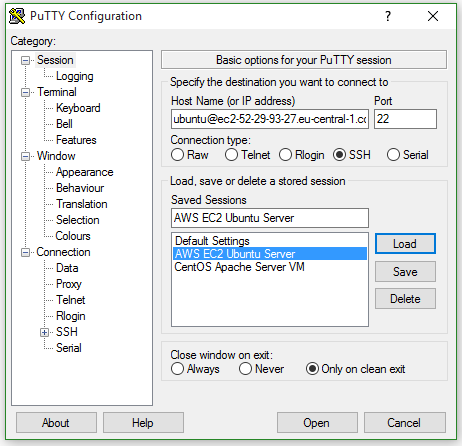
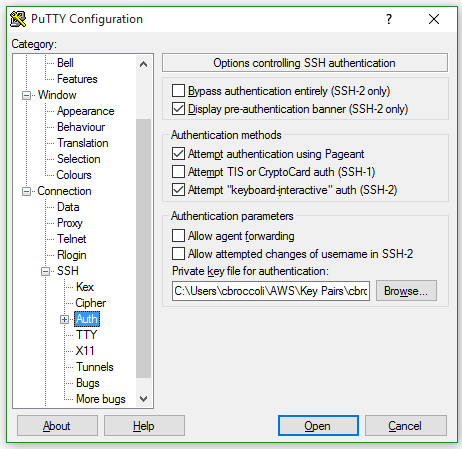
I setup the new user as described, added a .ssh directory under /home/username and then an authorized_keys file under that.  I used puttygen to generate the public and private keys.

putty_gen

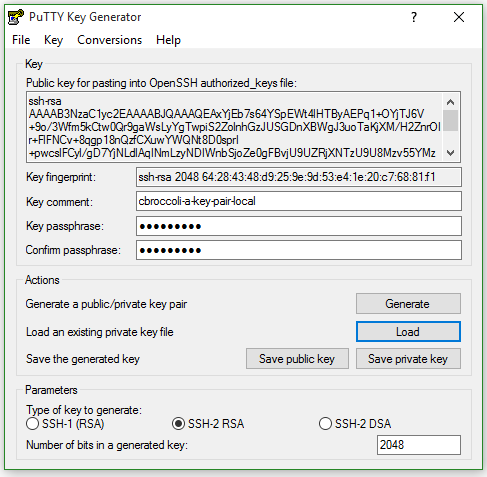
Using copy/paste, I copied the public key shown into the authorized_keys file.

ubuntu@ip-10-95-1-159:/home/cbroccoli-a$ sudo cat .ssh/authorized_keys
ssh-rsa AAAAB3NzaC1yc2EAAAABJQAAAQEAxYjEb7s64YSpEWt4lHTByAEPq1+OYjTJ6V+9o
/3Wfm5kCtw0Qr9gaWsLyYgTwpiS2ZolnhGzJUSGDnXBWgJ3uoTaKjXM/H2ZnrOIr+FlFNCv+8
qgp18nQzfCXuwYWQNt8D0sprI+pwcslFCyl/gD7YjNLdlAqINmLzyNDIWnbSjoZe0gFBvjU9U
ZRjXNTzU9U8Mzv55YMzhz4MM5jQ++1xdj1qeJTtHWZt+SSKPW6To+q7D4IlNoK
+irCV8L6CnvnPL0BvcuuXcuzhttnJ4Rwl6CbHft87n7blJb7tJAaQTtYV/SNGsz2oVr5Ytje
O0Z8lDQmN/SKd+WY+Ft6I7uJw== cbroccoli-a-key-pair-local

Finally I set the permissions to 700 on .ssh and 600 on the authorized_keys file.  All as described.  But when I tried to login, I got the error that the server rejected my key.

ssh_error

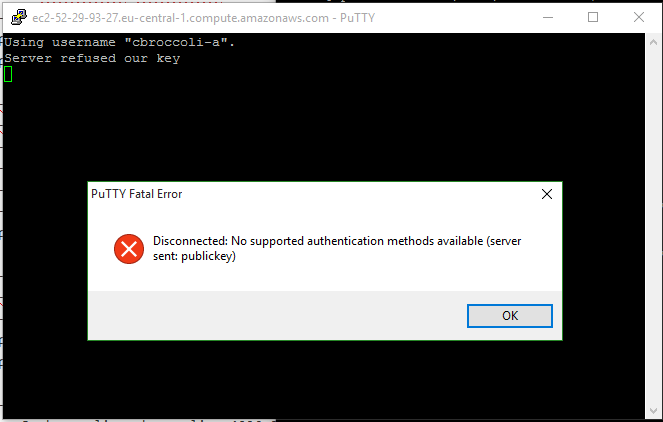
After some troubleshooting, I noticed the owner of the new .ssh directory and the authorized_keys file was root.  So for both I changed the owner to the new user and that finally solved the problem.

ubuntu@ip-10-95-1-159:/home/cbroccoli-a$ sudo ls -la
drwxr-xr-x 3 cbroccoli-a cbroccoli-a 4096 Oct 25 14:42 .
drwxr-xr-x 4 root        root        4096 Oct 25 14:28 ..
-rw-r--r-- 1 cbroccoli-a cbroccoli-a  220 Oct 25 14:28 .bash_logout
-rw-r--r-- 1 cbroccoli-a cbroccoli-a 3637 Oct 25 14:28 .bashrc
-rw-r--r-- 1 cbroccoli-a cbroccoli-a  675 Oct 25 14:28 .profile
drwx------ 2 root        root        4096 Oct 26 07:22 .ssh
ubuntu@ip-10-95-1-159:/home/cbroccoli-a$ sudo chown cbroccoli-a .ssh
ubuntu@ip-10-95-1-159:/home/cbroccoli-a$ sudo ls -la
total 24
drwxr-xr-x 3 cbroccoli-a cbroccoli-a 4096 Oct 25 14:42 .
drwxr-xr-x 4 root        root        4096 Oct 25 14:28 ..
-rw-r--r-- 1 cbroccoli-a cbroccoli-a  220 Oct 25 14:28 .bash_logout
-rw-r--r-- 1 cbroccoli-a cbroccoli-a 3637 Oct 25 14:28 .bashrc
-rw-r--r-- 1 cbroccoli-a cbroccoli-a  675 Oct 25 14:28 .profile
drwx------ 2 cbroccoli-a root        4096 Oct 26 07:22 .ssh
ubuntu@ip-10-95-1-159:/home/cbroccoli-a$ sudo ls -la .ssh
total 12
drwx------ 2 cbroccoli-a root        4096 Oct 26 07:22 .
drwxr-xr-x 3 cbroccoli-a cbroccoli-a 4096 Oct 25 14:42 ..
-rw------- 1 root        root         408 Oct 26 07:22 authorized_keys
ubuntu@ip-10-95-1-159:/home/cbroccoli-a$ sudo chown cbroccoli-a 
.ssh/authorized_keys
ubuntu@ip-10-95-1-159:/home/cbroccoli-a$ sudo ls -la .ssh
total 12
drwx------ 2 cbroccoli-a root        4096 Oct 26 07:22 .
drwxr-xr-x 3 cbroccoli-a cbroccoli-a 4096 Oct 25 14:42 ..
-rw------- 1 cbroccoli-a root         408 Oct 26 07:22 authorized_keys
ubuntu@ip-10-95-1-159:/home/cbroccoli-a$

Now I can login with a unique user, using a private key that only I know and possess.

ssh_login


Getting Started with AWS

Having long ignored trying out AWS I have finally taken the plunge and activated an account.  As a basic  use case, I want to investigate how I can build a standard web site to support a WordPress blog.  My plan would be to use an EC2 Ubuntu Linux instance to build a standard LAMP (Linux Apache MySQL PHP) server which I could install WordPress on.  There is a standard tutorial on Amazon to walk you through the process of doing exactly this, since it is a very standard setup. Not only should this save me a lot of time blundering through the setup, along the way I hope to gain more insight into how AWS works.

As a first step I walked through the basic setup steps documented in “Setting Up with Amazon EC2” with the following customization:

  • I configured two IAM Groups, one for Administrators and one for Operators to better understand the RBAC concept.  Of course I also needed to setup two users, one as admin and one as operator.
  • I configured a custom VPC with a public subnet.  This is part of the tutorial but may not be necessary.

VPC Setup

I added a standard security group as described in the tutorial as shown below.

security group

Once this was done, I moved onto the guide, “Getting Started with Amazon EC2 Linux Instances.” I selected a Ubuntu t2.micro instance and configured it with my new VPC and Security Group.  I used the key I generated in the tutorial as described and then launched the instance.  It took less than a minute to show it was running.

instance

Once it was up, I proceeded to connect via putty to the instance using the configuration below.

putty putty_ssh

Which worked without any problems…

screen

Since I logged in with the user Ubuntu using the ssh key for my user, the next step is to setup a local user with a real user name using a privately generated key pair unknown to Amazon and disable the ubuntu generic user.

IPTables

One of the interesting features of using CentOS was that IPTables are installed by default.  IPTables is a host based statefull firewall which can be useful for securing a small number of simple servers.  As the number of servers grows or the complexity of the rulebase increases, it would make sense to begin using a host based firewall solution which supports central management and logging.

IPTables rule files are stored under /etc/sysconfig and by default, it sends all logs as standard syslog to /var/log/messages.  The /etc/sysconfig directory contains two files:

  • iptables contains rules for IPv4 services
  • ip6tables contains the rules for IPv6 services

IPtables are managed using a command line syntax to insert, append or delete lines into the respective files.  The command syntax is discussed  in a number of posts, so I won’t go into that here.   The default rules allow everything out of the server and only lets ssh in.   Since the command line is cumbersome, I chose to set up my initial rulebase by replacing the default file with the new file.  Of course, until I was sure that the new rulebase worked, I kept a backup copy of the original rulebase just in case.  Future changes can then be made through the command line.

For a standard web server, I used the following two base files.  The configurations create a new chain called RH-Firewall-1-INPUT into which both the INPUT and FORWARD chains are redirected.  This rulebase also logs all dropped packets to the default file /var/log/messages with the prefix “Firewall-log: “. This makes it easy to view dropped packets by grepping for “Firewall” when viewing the log file.

iptables:

*filter
:INPUT DROP [0:0]
:FORWARD DROP [0:0]
:OUTPUT ACCEPT [0:0]
:RH-Firewall-1-INPUT - [0:0]
-A INPUT -j RH-Firewall-1-INPUT
-A FORWARD -j RH-Firewall-1-INPUT
-A RH-Firewall-1-INPUT -i lo -j ACCEPT
-A RH-Firewall-1-INPUT -p icmp --icmp-type echo-reply -j ACCEPT
-A RH-Firewall-1-INPUT -p icmp --icmp-type destination-unreachable 
  -j ACCEPT
-A RH-Firewall-1-INPUT -p icmp --icmp-type time-exceeded -j ACCEPT
# Accept Pings
-A RH-Firewall-1-INPUT -p icmp --icmp-type echo-request -j ACCEPT
# Accept any established connections
-A RH-Firewall-1-INPUT -m state --state ESTABLISHED,RELATED -j ACCEPT
# Accept ssh traffic. Restrict this to known ips if possible.
-A RH-Firewall-1-INPUT -m state --state NEW -m tcp -p tcp --dport 22 
  -m limit --limit 3/min --limit-burst 3 -j ACCEPT
-A RH-Firewall-1-INPUT -m state --state NEW -m tcp -p tcp --dport 80 
  -j ACCEPT
-A RH-Firewall-1-INPUT -m state --state NEW -m tcp -p tcp --dport 443 
  -j ACCEPT
#Log and drop everything else
-A RH-Firewall-1-INPUT -j LOG --log-prefix "Firewall-Log: "
-A RH-Firewall-1-INPUT -j DROP
COMMIT

ip6tables:

*filter
:INPUT DROP [0:0]
:FORWARD DROP [0:0]
:OUTPUT ACCEPT [0:0]
:RH-Firewall-1-INPUT - [0:0]
-A INPUT -j RH-Firewall-1-INPUT
-A FORWARD -j RH-Firewall-1-INPUT
-A RH-Firewall-1-INPUT -i lo -j ACCEPT
-A RH-Firewall-1-INPUT -p ipv6-icmp -j ACCEPT
# Accept any established connections
-A RH-Firewall-1-INPUT -m state --state ESTABLISHED,RELATED -j ACCEPT
# Accept ssh traffic. 
-A RH-Firewall-1-INPUT -m state --state NEW -m tcp -p tcp --dport 22 
  -m limit --limit 3/min --limit-burst 3 -j ACCEPT
-A RH-Firewall-1-INPUT -m state --state NEW -m tcp -p tcp --dport 80 
  -j ACCEPT
-A RH-Firewall-1-INPUT -m state --state NEW -m tcp -p tcp --dport 443 
  -j ACCEPT
#Log and drop everything else
-A RH-Firewall-1-INPUT -j LOG --log-prefix "Firewall-Log: "
-A RH-Firewall-1-INPUT -j REJECT --reject-with icmp6-adm-prohibited
COMMIT

The following commands are useful for managing and monitoring IPTable activity:

Viewing the rules with their respective line numbers (in case you want to delete or insert lines) –

# iptables --line-numbers -n -L

Viewing the rules with number of hits and bytes per rule (to see if the rule is actually working) –

# iptables -L RH-Firewall-1-INPUT -v -n -x

Stopping, starting and restarting –

# service iptables start/stop/restart

After making changes with the command line, do not forget to save the changes with the command before restarting the service –

# service iptables save

Some interesting notes:

  • PUTTY works with both IPv4 and IPv6 to ssh to a client.
  • Stopping, starting and restarting iptables has no impact on established sessions.  So if you are logged into a server via SSH, then you shouldn’t lose your session by restarting iptables.  Just in case there is an issue or if you are worried that you might lock yourself out of the server, you can use a simple shell script to stop iptables if the connection is lost (see below).
   #!/bin/bash
   #
   # Perform 6, 10 second loops to delay for one minute
   # Stop the script if everything goes as planned within 
   # the 60 seconds.
   #
   x=0
   y=60
   echo "Start"
   while [ $x -lt $y ];
    do
        echo $x
        x=$(($x + 10))
        sleep 10s
   done
   service iptables stop
   echo "All Done"
  • If at any time you edit the rules using the GUI, it will reset the entire file to the original default format removing all changes you made.

References:

http://wiki.centos.org/HowTos/OS_Protection